

Eye Care, Eye Care How To, mypear
Step-by-Step Guide to Applying Eye Drops Like a Pro
Applying eye drops may sound simple, but many people struggle to get it right. Whether you wear contact lenses you’re, suffer from dry eyes, or are simply integrating eye drops into your daily routine, proper application is vital for ensuring the maximum benefits and maintaining eye health.
This comprehensive step-by-step guide will help you master applying eye drops so you feel confident and comfortable every time. We’ll also address common mistakes, offer tips, and guide you in choosing the best products for your needs.
Why Proper Eye Drop Application Matters
Improper application can lead to wasted medication and even eye irritation. Many people face challenges such as blinking or missing their aim, which can reduce the efficacy of the treatment and decrease comfort. Perfecting your technique ensures the medication works properly and helps avoid contamination and discomfort.
Read on to sharpen your skills and achieve optimal eye care.
Step 1: Preparing for Application
Preparation makes all the difference before applying eye drops. Taking the correct steps sets the tone for a smooth experience.
1.1 Wash Your Hands Thoroughly
Always begin by washing your hands with soap and water. Dirty hands lead to potential contamination of the eye drop bottle and even infections. Dry your hands with a clean towel to avoid introducing lint to your eyes.
1.2 Check the Eye Drop Solution
Inspect the bottle to ensure:
- It’s the correct medication or tear type.
- The eye drops haven’t expired. Using expired drops can reduce effectiveness or cause harm.
1.3 Understand Your Eye Condition
Know what your specific drops aim to do. For instance:
- Dry Eyes: Use lubricating drops like I-Drop Pur Gel or I-Drop Pur available at MyPear.ca.
- Allergies: Opt for anti-allergy drops.
- Other Conditions: Follow any special instructions from your doctor.
Step 2: Positioning Yourself Correctly
Proper positioning will help you hit your target effortlessly.
2.1 Find a Comfortable Position
You can either:
- Tilt Your Head Back: Sit or stand upright and tilt your head gently backward.
- Lie Down: This is often easier for beginners because it reduces the urge to blink.
2.2 Use a Mirror (If Needed)
If you’re new to using eye drops or struggle with aiming, place a mirror before you. This will help you feel more in control and guide your technique.
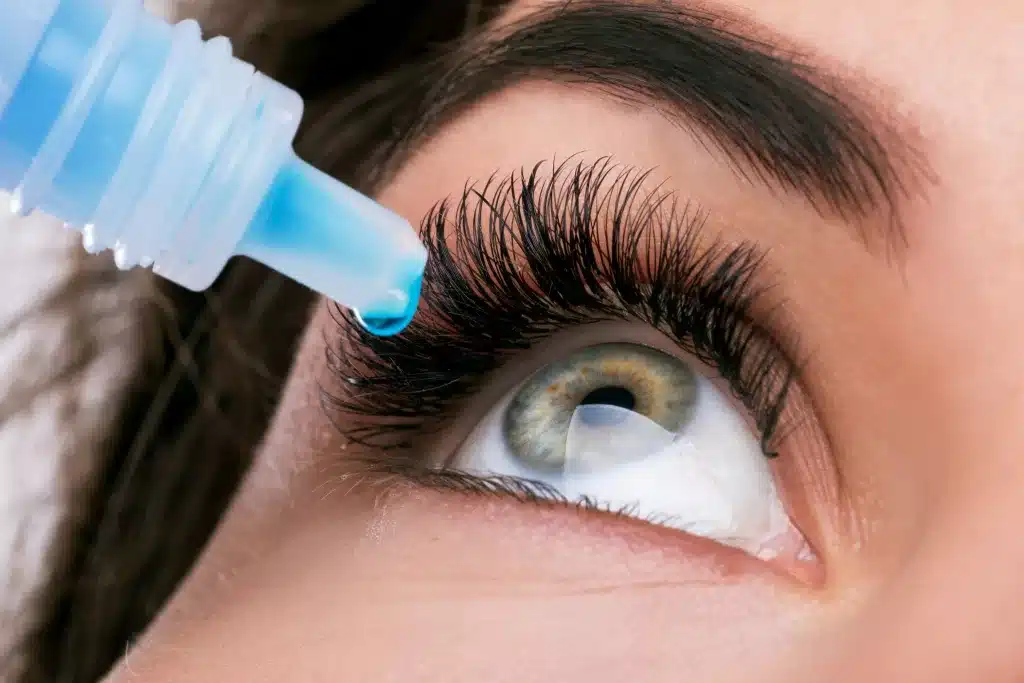
Step 3: Applying the Eye Drops
Now comes the central part! Follow these tips for a smooth and effective process:
3.1 Pull Down the Lower Eyelid
Use one hand to gently pull down your lower eyelid to form a small pocket. This pocket will “catch” the drop, ensuring it doesn’t spill onto your cheek.
3.2 Aim the Dropper
Hold the eye drop bottle with your other hand, about 1 inch above your eye. Be careful not to touch your eyes or eyelashes; doing so can introduce bacteria.
3.3 Squeeze Gently
Squeeze the dropper firmly but gently to release a single drop into the pocket. Most people only need one drop per application. Avoid squeezing too hard to prevent excess solution.
3.4 Avoid Contact
Ensure the dropper tip does not touch your eye, hands, or face. This prevents contamination and maintains the product’s sterility.
Step 4: Post-Application Techniques
What you do after applying the drops is just as important.
4.1 Close Your Eyes Gently
Resist the urge to blink rapidly after application. Instead, close your eyes gently for 1–2 minutes. This allows the solution to spread evenly across your eye.
4.2 Avoid Excessive Blinking
Blinking excessively can disrupt absorption and cause the drop to spill out.
4.3 Wipe Away Excess
If any solution spills onto your face, use a clean tissue to blot it away gently.
Step 5: Common Mistakes to Avoid
Learning what not to do will set you up for success.
- Touching the Dropper: Touching your eye with the dropper introduces bacteria and increases the risk of infection.
- Using Expired Eye Drops: Expired drops lose their potency and can irritate your eyes.
- Sharing Eye Drops: Sharing spreads bacteria, even among family members.
- Using Eye Drops Over Contact Lenses: Unless the product is specifically designed for contact lens wearers (e.g., preservative-free drops), remove your lenses before applying.
Step 6: Choosing the Right Eye Drops
Picking the correct drop can make a world of difference. With so many options, here’s a quick overview of products that can effectively address your needs:
- For Dry Eye Relief: I-Drop Pur Gel offers long-lasting hydration.
- For General Use: I-Drop Pur is preservative-free, making it ideal for sensitive eyes.
- For Eyelid Care: I-LID’ N LASH® Plus Wipes complement eye drop routines by cleaning and conditioning the eyelids.
Shop these and more at MyPear.ca to get started today.
Step 7: When to Consult a Doctor
While eye drops can provide relief, certain situations require professional advice. Consult your doctor if you experience any of the following:
- Persistent dryness, redness, or discomfort.
- Signs of an allergic reaction, such as swelling or itching.
- Suspected eye infections (e.g., yellow or green discharge).
- Any symptoms that do not improve after regular use of eye drops.
Achieve Better Eye Health Today
Applying eye drops shouldn’t be a daunting task. You can transform a frustrating routine into a stress-free habit with the proper preparation, technique, and tools.
Need quality eye drops or eyelid care products? Shop now at MyPear.ca! Explore top-rated drops like I-Drop Pur Gel or I-LID’ N LASH® Wipes for superior eye care solutions.
Take control of your eye health and experience comfort like never before.
This content has been reviewed by Optometrist Dr. Davinder Sidhu